Master Your Boat's Maneuverability: DIY Stern Thruster Installation
If docking still feels like guesswork, a Vetus Catalogue stern thruster may be your missing link. For boats with outboards or limited low-RPM thrust, this is a game-changer. Many boat owners now take on this as a DIY project, especially using kits designed with the DIY'er in mind. With planning and a free weekend, this upgrade can greatly improve control — and confidence.
Start Your DIY JourneyWhat is a Stern Thruster?
A stern thruster is a propulsion device mounted at the rear of your boat that provides lateral thrust, allowing you to move the stern left or right without using the main engine. This is especially valuable for boats with outboard motors or those that lack effective low-speed maneuvering capability.

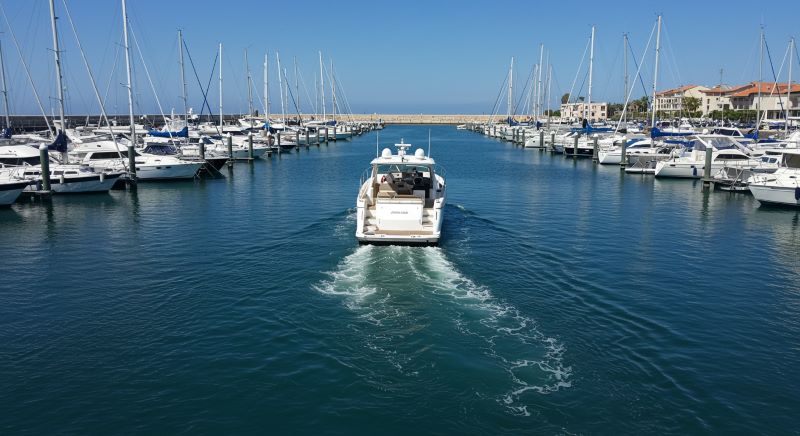
Professional stern thruster installation on a 35-foot yacht provides precise docking control
How It Works
The thruster consists of a propeller mounted in a tunnel through the hull or in an external pod. When activated, it pushes water sideways, creating lateral force that moves your boat's stern in the desired direction.
- Electric motor drives a propeller
- Tunnel or pod design for water flow
- Joystick or button control from helm
- Instant response for precise positioning
Key Benefits
Installing a stern thruster transforms your docking experience, especially in challenging conditions like wind, current, or tight marina spaces.
- Precise boat positioning in any conditions
- Reduced stress during docking maneuvers
- Better control in wind and current
- Ability to dock single-handed
- Increased confidence and safety
- Protection from dock damage
Perfect for Outboard-Powered Boats
Outboard motors excel at forward propulsion but can be challenging for precise docking maneuvers. Unlike inboard engines with prop walk, outboards provide limited low-speed directional control. A stern thruster fills this gap perfectly, giving you the precise control you need for confident docking.
Why Choose DIY Installation?
Many boat owners are discovering that DIY stern thruster installation is not only possible but also rewarding. With the right guidance, tools, and planning, you can save thousands while gaining intimate knowledge of your boat's systems.
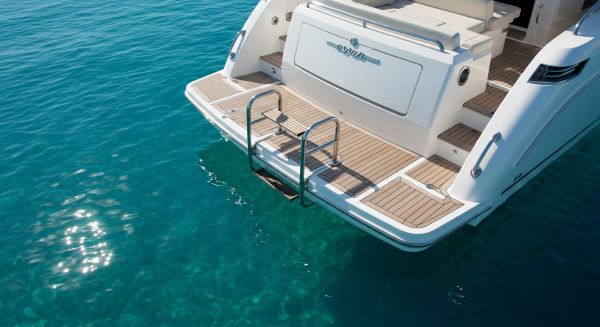
Challenging docking situations like this become manageable with stern thruster assistance
DIY Advantages
- Save $2,000-$4,000 in labor costs
- Learn your boat's systems intimately
- Work at your own pace and schedule
- Gain confidence for future projects
- Ensure quality workmanship
- Customize installation to your preferences
What You'll Need
- Basic mechanical and electrical skills
- Standard boat maintenance tools
- Weekend or two for installation
- Patience and attention to detail
- Willingness to learn and ask questions
- Proper safety equipment and procedures
Is DIY Right for You?
Good DIY Candidates
- Comfortable with basic boat maintenance
- Have experience with electrical connections
- Enjoy learning new skills
- Have access to basic tools
- Can follow detailed instructions
- Value understanding their boat's systems
Consider Professional Help If
- Uncomfortable with electrical work
- Limited time for the project
- Complex boat systems integration needed
- Warranty concerns with professional installation
- Prefer to focus on boating, not maintenance
- Boat requires extensive modifications
Planning Your Installation
Successful DIY installation starts with thorough planning. Understanding your boat's configuration, selecting the right system, and preparing properly will ensure a smooth installation process.
Step-by-Step Planning Process
1. Assess Your Boat
- Measure available space at the stern
- Evaluate hull construction and thickness
- Check electrical system capacity
- Identify optimal thruster placement
- Consider impact on boat balance
2. Choose Your System
- Determine required thrust power
- Select tunnel vs. external pod design
- Choose control system type
- Consider integration with existing electronics
- Plan for future expansion or upgrades
Professional installation showing proper stern thruster placement and integration
Key Planning Considerations
Technical Factors
- Hull Material: Fiberglass, aluminum, or wood considerations
- Space Requirements: Tunnel diameter and installation clearance
- Electrical Needs: 12V vs 24V systems and amp draw
- Weight Distribution: Impact on boat trim and balance
- Water Flow: Ensuring adequate water flow for cooling
Practical Considerations
- Access: Ability to reach installation area
- Timeline: Realistic project duration
- Budget: Total cost including tools and materials
- Support: Available help and expertise
- Testing: Plan for sea trials and adjustments
Professional Planning Support Available
While DIY installation is definitely achievable, proper planning is crucial for success. I offer comprehensive planning consultations to help you assess your boat, choose the right system, and develop a detailed installation plan. This upfront investment in planning can save you time, money, and frustration during the actual installation.
Popular Stern Thruster Systems
Several manufacturers offer excellent stern thruster systems designed with the DIY installer in mind. Here's an overview of the most popular options, each with their own advantages for different boat types and installation scenarios.
Leading Manufacturers
Sideshift Thrusters
Specifically designed for DIY installation, Sideshift offers comprehensive kits with detailed instructions and excellent support.
- Complete DIY-friendly installation kits
- Excellent documentation and support
- Proven reliability in marine environments
- Multiple power options available
- Good value for DIY installations
Max Power Thrusters
Reliable tunnel thrusters with straightforward installation procedures and robust construction for long-term durability.
- Simple, reliable tunnel design
- Robust construction for durability
- Straightforward installation process
- Good parts availability
- Competitive pricing for quality
Lewmar Thrusters
Premium marine equipment manufacturer offering high-quality thrusters with advanced features and excellent build quality.
- Premium build quality and materials
- Advanced control system options
- Excellent corrosion resistance
- Comprehensive warranty coverage
- Integration with marine electronics
Quick Thrusters
Italian engineering excellence with innovative designs and high-performance systems for demanding applications.
- Innovative Italian engineering
- High-performance systems
- Compact design options
- Advanced control technologies
- Excellent power-to-weight ratio
System Comparison
| Feature | Sideshift | Max Power | Lewmar | Quick |
|---|---|---|---|---|
| DIY Friendliness | Excellent | Good | Good | Moderate |
| Documentation | Comprehensive | Good | Excellent | Good |
| Price Range | $2,500-$4,000 | $2,000-$3,500 | $3,500-$6,000 | $4,000-$7,000 |
| Power Options | 12V/24V | 12V/24V | 12V/24V | 12V/24V/Hydraulic |
| Warranty | 2-3 years | 2 years | 3-5 years | 2-3 years |
Installation Overview
While every installation is unique, the basic process follows a similar pattern. Understanding these steps helps you prepare for your project and identify where you might need additional support or expertise.
Major Installation Phases
Phase 1: Preparation
- Final measurements and planning verification
- Gather all tools and materials
- Prepare work area and safety equipment
- Review installation instructions thoroughly
- Plan for potential complications
Phase 2: Hull Work
- Mark and verify thruster tunnel location
- Cut thruster tunnel opening
- Install tunnel tube and secure properly
- Seal and waterproof all connections
- Test for leaks before proceeding
Phase 3: Electrical
- Plan electrical routing and connections
- Install dedicated circuit and breaker
- Run power cables to thruster location
- Install control system and wiring
- Test all electrical connections
Phase 4: Final Assembly
- Install thruster motor in tunnel
- Connect all electrical systems
- Install and configure control system
- Perform comprehensive system testing
- Complete sea trials and adjustments
Essential Tools and Materials
Required Tools
- Cutting Tools: Hole saw, jigsaw, or rotary cutter
- Drilling: Various drill bits and hole saws
- Electrical: Wire strippers, crimpers, multimeter
- Measuring: Tape measure, square, level
- Safety: Eye protection, dust masks, gloves
- Finishing: Sandpaper, files, sealants
Materials Needed
- Thruster Kit: Complete system with motor and tunnel
- Electrical: Marine-grade wire, connectors, breaker
- Sealants: Marine sealant, fiberglass resin
- Hardware: Stainless steel bolts, washers, nuts
- Protection: Wire loom, heat shrink tubing
- Finishing: Gelcoat, paint, or protective coatings
Professional Installation Support
While this overview gives you an idea of the process, every boat is different. I provide detailed, step-by-step installation guidance customized to your specific boat and chosen thruster system. This includes custom diagrams, video support during critical phases, and troubleshooting help if issues arise.
My Services
DIY Installation Guidance
Step-by-step consultation for your stern thruster installation project, from planning to completion.
Learn MoreSystem Selection Help
Expert advice on choosing the right thruster system for your specific boat and docking needs.
Learn MoreTroubleshooting Support
Help diagnosing and fixing common stern thruster issues to keep your system running smoothly.
Learn MoreMaintenance Planning
Develop a maintenance schedule to extend the life of your thruster system and ensure reliable operation.
Learn MoreAbout Me
Galveston Marine Enthusiast
Based in Galveston, Texas, I've spent years perfecting boat modifications and helping fellow boaters improve their docking experience. My passion for marine engineering and DIY projects has led me to specialize in stern thruster installations.
Read My StoryHands-On Experience
With dozens of successful DIY installations under my belt, I understand the challenges boat owners face when upgrading their vessels. I believe in empowering fellow enthusiasts with the knowledge and confidence to tackle these projects themselves.
Learn MoreReady to Transform Your Boating Experience?
Whether you're dealing with challenging docking conditions or simply want better control of your vessel, a stern thruster installation can be a game-changer. Let's discuss your specific needs and get you started on this rewarding DIY project.